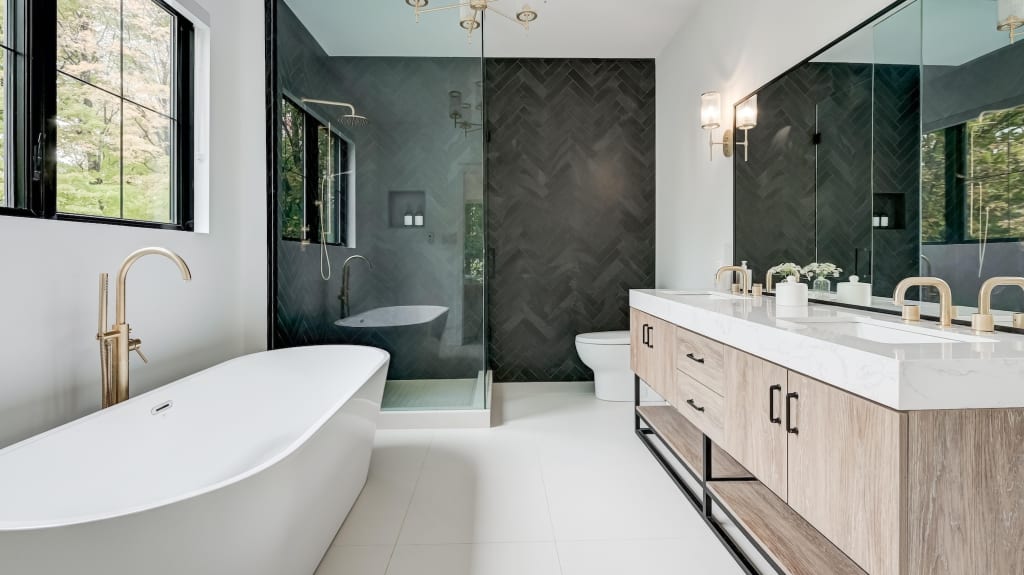

As aging in place and multigenerational families become more common, more homeowners are looking into accommodating disabilities and infirmity. For both safety and convenience, a barrier-free washroom is usually first on the list. When family members begin to struggle with rising from the toilet or stepping out of the bath, accommodations can prevent a dangerous fall. They can also provide a better quality of life, allowing both safety and independence.
An accessible bathroom takes planning and effort and money, but it’s all worthwhile to have a bath which is comfortable and safe to use. It may even add substantially to the value of the home.
How to design a barrier-free washroom
The first step is to consider the people who will be using the bathroom. What are their needs? Will they require assistance from caregivers? If the primary user can walk, grab bars may be enough for now. For people who use wheelchairs, many more considerations arise, and a shower seat will probably be necessary. For full-time wheelchair users with shower-capable chairs, the facilities must accommodate the chair itself.
Bathroom layout
A barrier-free washroom requires the large fixtures to be at least 30” apart and needs a central clear space 60” in diameter for maneuvering. That said, it can be fairly small if the layout is clever. A barrier-free shower can double as maneuvering room, and the same clear area can serve a shower, sink, and toilet placed around it. Several accessible bathroom layouts use this approach.

Safety
The foremost safety features are the elimination of physical barriers (e.g., a too-high shower curb) and the addition of grab bars. These two changes greatly reduce the risk of falling, and they may be enough for users whose mobility is only somewhat restricted. Others may require something more extensive, as explored below.
The safety standards cited in this article were taken from the American National Standards Institute (ANSI), a non-profit organization that creates technical guides for accessible design. While Canada does have its own version (the Canadian Standards Association), ANSI has higher requirements for safety.

Ease of cleaning
Cleaning a bathroom is never pleasant, but choosing the largest tiles will minimize grout and thus reduce cleaning needs. Vinyl wall covers are becoming increasingly popular – they can be wiped clean with a sponge, unlike painted drywall.

How big is an accessible bathroom?
A non-negotiable requirement is a clear space measuring at least 60” in diameter. The fixtures also need room, though the shower space may double as part of the manoeuvring space. A 7 ft x 7 ft room is about the smallest usable space.
How much does it cost to build an accessible bathroom?
Renovating a bathroom is usually a major project. A new shower pan and a few grab bars may be only a few hundred dollars, but larger changes are likely to run $8,000 to $12,000, and a thorough renovation with major accommodations may cost up to $40,000.
Fortunately, renovation grants and tax breaks are available to help. The financial plan may be as important as the bathroom plan.
Choosing fixtures for an accessible bathroom
A bathroom is only as accessible as its fixtures. Here are some elements to consider.
Toilets
A key fixture in any bathroom, the toilet has to meet the user’s needs while maintaining autonomy. Here are some ways to make toilet use barrier-free.
Dimensions and design elements
The toilet should have its back against a wall and be near another wall on the side. The centre of the toilet should be 17–19” from the side wall. It should be in an otherwise-clear area extending at least 60” from the side wall and 54” from the back wall (ANSI 604.3.1).

Toilet models
Replacing the toilet with an elongated, comfort-height model will allow users to stand more easily. Comfort height is generally thought to be 17–19” including the seat (but not the lid). Putting a thicker seat on an existing toilet will also raise the height, and there are seat attachments which will add a second, higher seat.
Consider your home’s specific needs, though. If the bathroom user owns a shower wheelchair with an open seat, a standard-height toilet (lower than 17”) may allow them to take care of needs without leaving the wheelchair.

Toilet controls
All mechanisms for flushing and cleaning should be located within easy reach. Consider using bright colours for toilet controls to aid folks with limited vision. A remote control for features like a bidet seat is also useful for folks with limited hand mobility or without arms.

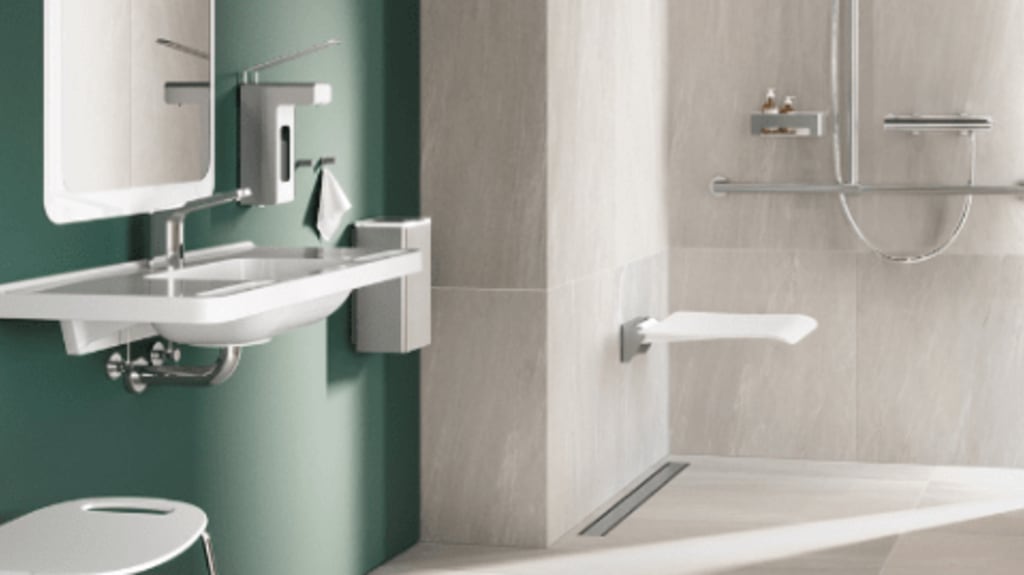
Showers
Showers can be a bit tricky for folks who use mobility aids. Here are some things that can help create a barrier-free washroom. This is by no means an exhaustive list – it’s a starting point to get you thinking.
Dimensions and design elements
The first step to a barrier-free bath is removing literal barriers. A tub-shower combo usually won’t do. A traditional shower stall has a rim around the shower pan, which will block wheelchairs and may even trip a walking user. The shower floor should be level with the bathroom floor, with no curb, and slope gently down to the drain to prevent water from escaping. Barrier-free shower pans are widely available, and for some showers it may be as simple as swapping one in.
For most showers, more renovation work will be needed. A roll-in shower should have internal dimensions of no less than 60” by 30” (ANSI 608.2.2). If some users are ambulatory or use wheelchairs which aren’t shower-safe, a shower seat will also be needed. Fold-down seats can be mounted on the wall, saving space when folded up. Standalone seats can hold more weight, and built-in seats are usually the sturdiest. Seat room is in addition to the main shower floor, so extra room must be allotted for the seat.
The shower should have 60” by 30” of clearance on the access side (ANSI 608.2.2.1).

Shower models
Many different kinds of showers are available, both prefabricated and built-in. The advanced features are nice, but a barrier-free washroom means a few restrictions. The stall must be at least 30” by 60”, with manoeuvring room in front. Fortunately, many prefabricated showers meet these requirements, and they can often be dropped in to replace existing standard bathtubs.
Once a barrier-free shower is planned, another access issue is the shower door. As with the door to the bathroom itself, most shower doors are too narrow for a wheelchair. Some may even be awkward for those walking with crutches. The average wheelchair is 27” from wheel to wheel, requiring a door width of no less than 32” for convenient access. Wider wheelchairs, including bariatric wheelchairs, may need up to 48” for easy passage. This isn’t practical for most showers.
A shower curtain will usually work, but another increasingly popular option is to have a doorless, open shower. The shower also needs enough room that spray won’t escape the stall, and the spray should be angled away from the doorway.

Showerheads and water pressure
Showerheads should also be installed at heights and positions that make sense for the user, with options for water flow intensity. The taps can simply be lowered, since standing users can still access those, but a hand shower is the best option for many. Most have controls on the spray wand, so that the user needs to reach the main tap only seldom.
Shower controls
As with sinks, a single control is easier than separate hot and cold taps. If separate taps are desired, levers are usually easier than knobs.
Bathtubs
What if the residents also want to enjoy baths? Many of us assume that baths must be sacrificed when mobility lessens, but some options are available if bathroom space allows.
Dimensions and design elements
Bathtubs, like showers, require adjoining clearance space. The requirements vary by type of tub, but most will need at least 60” by 30” of space (ANSI 4.20.2).

Bathtub models
Some people with lowered mobility may be able to use a walk-in bathtub. There is usually some curb, but it’s much lower than with traditional tubs. There may be a door or rising wall so that the user can soak in more water. The lower barrier, plus grab bars for stability, can accommodate bathers who can safely step over small curbs. Many have a moulded seat, so the bather doesn’t have to stand up from the floor.
For users who want a more conventional bath, the only real options are a caregiver’s assistance or a bath lift. Bath lifts are chairs which lower the user down into a tub and then raise to chair height again afterwards. Most are battery-powered, but a few use water power from the plumbing itself.

Bathtub controls
Ensure that the taps are well-labelled and within reach. If the model features luxury elements like water jets (jacuzzi tubs), the buttons and settings should be easy to operate and feature a timer.
Sinks, vanities, and storage
Unsurprisingly, this fixture gets a lot of use: it’s the go-to spot for daily grooming activities, from brushing your teeth to styling your hair. There are a lot of elements to consider for sinks and vanities, so let’s dive in.
Dimensions and design elements
With sinks, the most important considerations for wheelchair users are height and knee room. If the sink will be used only for handwashing, a standard 36-inch sink might be a bit awkward, but it’s usable.
If the sink will be used more frequently or for longer periods of time, it’s more important to make it wheelchair-friendly. Lowering the sink to 30–33” makes the basin and faucets easier to reach. A maximum height of 34” is recommended (ANSI 606.3). The bottom should be 24” from the floor, so it’s important that the sink not be too thick.

Sink models
If possible, choose sinks with countertops instead of wall-hung or pedestal sinks. They’ll give you a bit of extra storage space for your medicine, soap, and toothbrush. Also, choose a shallow sink, and be mindful of plumbing placement. You don’t want anyone to burn themselves on hot pipes.
If cabinetry is desired around the sink, the standard toe kick must be enlarged and deepened to accommodate a wheelchair user’s knees. Knee clearance should be at least 24” above the finished floor (ANSI 606.2.4). Ideally, a knee well should have 27” of clearance and be no less than 17” in depth. Plumbing is allowed to dip into this area, since a drainpipe will simply fit between the user’s knees.
There are a few other options for sink cabinetry (detailed in ANSI 306). For a vanity sink, this may be worth exploring in depth. For many of us, it’s simpler to mount a floating sink on the wall, leaving the area beneath clear, and to install cabinetry separately.
A sink requires a clear floor space of 48” deep by 30” wide (ANSI 606.2, 305). If the sink counter is wider than 30”, clear space for the entire sink would be ideal.

Faucets
It’s best to have only one tap so that the users don’t need to grab or twist. It may be installed on the side of the sink, instead of on or by the wall, so that users don’t have to reach as far.
Some may want to install hand sensors, so that no faucet at all is needed.

Vanities
You’re not going to be able to have an antique vanity cabinet if the user has a wheelchair. You might be able to get away with a floating vanity that has a single pull-out drawer (depending on height and clearance). Vanities should follow the guidelines for sinks: 30–33” high on top, 24–27” clearance underneath.
Most of us want a mirror on the wall behind the sink and/or vanity. The mirror should be lowered by several inches, just as the sink was. A tall mirror may be able to accommodate both seated and standing users.

Storage solutions
A traditional medicine cabinet isn’t a great choice for a wheelchair user, who won’t be able to reach it easily. If the vanity is near a wall, wall-mounted storage at an appropriate height may be the best solution.

Other considerations for a barrier-free washroom
Fixtures aren’t the be-all end-all of bathroom accessibility. Here are some other key factors in creating a safe and functional space.
Bathroom entry and doors
Access to the bathroom itself is an important consideration. A standard 30” doorway is tricky for standard wheelchairs and impassable for larger ones. The doorway must be at least 32” for a standard wheelchair (ANSI 404.2.3), and wider is better.
Most bathroom doors open inward, but many wheelchair users prefer the door to open outwards. Many wheelchair users use the side walls of the bathroom to push themselves in and out of a room. Inward-opening doors may create awkward gaps between the door and its frame, which can cause problems for people using either wheelchairs or mobility aids like walkers.
Pocket doors and barn doors save space, but have their own issues. Pocket doors are known for getting stuck and requiring a lot of jostling to get moving again. Barn doors need free space along the wall.
Operating the door may also be a problem. A seated user has to lean forward to reach the handle, and those using other mobility aids may have trouble getting a hand free for the doorknob. A powered door opener, operated by wall-mounted buttons, is one solution.
Given the door issues, some homeowners might choose to have no traditional door. A curtain or a non-latching door which swings both ways can provide some visual privacy from a shared area, but a simple open doorway can also work if the barrier-free washroom is behind a bedroom door. Even without accessibility considerations, many en suites are doing away with bathroom doors.

Lighting
Inadequate light contributes to falls in the bathroom. Be sure that there’s enough light and that the light switches are at an appropriate height for the user. For those with arthritis or other hand issues, large switches may be easier than standard switches. Mount switches 38–44” high, so that wheelchair users can reach them easily.
Glow-in-the-dark switch plates can help users with vision issues find the switch. Motion-activated lights are also an option.

Grab bars
Even if shower users are expected to be seated, the shower stall should have grab bars. They should be installed between 33” and 36” from the finished floor (ANSI 609.4). They are generally within the shower stall, and many have an additional grab bar on the closest outside wall.
Bathtub grab bars should be available even when a bath lift is installed, in case of emergency, and are vital without one. Bathtub grab bar guidelines are a little complicated. The tub should have two bars along the back wall, one at the same height as a shower (33–36” high) and the other 8–10” above the rim of the bathtub. Another grab bar, at least 24” long, should be mounted 33–36” high on the wall which has the bathtub controls. If the bathtub has no fixed seat, a fourth grab bar at least 12” long and at a 33–36” height should be mounted on the wall opposite the controls (ANSI 607.4).
The toilet will also need grab bars for safety. A standalone safety frame is easy to place, but wall-mounted grab bars accommodate more users. Grab bars should be provided on the back wall and on the side wall closest to the toilet. The rear grab bar should be at least 24” long, centred on the toilet. If space allows, it should be up to 36” long, with the extra length on the transfer side of the toilet (ANSI 604.5). The side grab bar should begin about 12” from the rear wall, ideally extending up to 42” total bar length.

Interior finishes
Anti-slip tiles are a solid choice for flooring. If a more elegant look is desired, slate tiles also provide more traction than average.

Environmental controls
A heated floor may provide comfort for those who find slippers too slippery.
Things to consider when designing a handicap accessible bathroom
In a perfect world, there would be a single right solution for each aspect of accessible design. In our world, we often have to make choices.
Accessible showers VS walk-in tubs
A tub, even a walk-in tub, presents many challenges for the disabled. An accessible tub is also considerably more expensive than an accessible shower. Most folks prefer the accessible shower, often converting an existing tub to a barrier-free shower.
With enough space, a barrier-free washroom could have both. However, if space is too limited for both and a tub is strongly desired, it’s possible to use a walk-in bathtub as a shower pan.

Universal design VS accessible design
Accessible design creates spaces for those with disabilities, while universal design aims to be usable by everyone regardless of ability. Most able-bodied people can manage with accessible facilities, and so the disabled user’s needs must be paramount when there is a conflict, but it’s often possible to accommodate both.
For instance, a bathroom vanity might have one sink 32” high and another sink at a standard 36” high. A tall wall mirror can be used by both seated and standing people.

CSA VS ADA compliance
The Canadian Standards Association and the Americans with Disabilities Act both provide guidelines on accessible bathrooms, and in most important respects they are identical. Where they differ, the ADA usually gives a somewhat higher standard. For instance, the CSA requires 760 x 1,220 mm (about 30” x 48”) in front of a fixture, while the ADA requires 30” x 60”.
It’s better to meet the higher standard when possible, which is probably why so many Canadian resources cite the ADA.
Making your home more accessible
Now that you have an overall plan for your barrier-free washroom, it’s time to consider specific bathroom designs. You might even save time and money by renovating the kitchen and bathroom together.